kf8kk.com

John Martins'
Amateur Radio from near Empire Michigan USA


Other Useful Pages:

W8TVC.COM

IOOK.ORG

Rubber Ducks

VHF Propagation


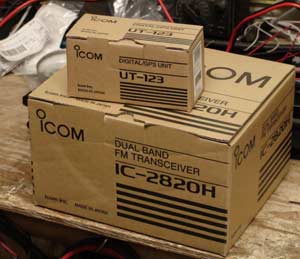
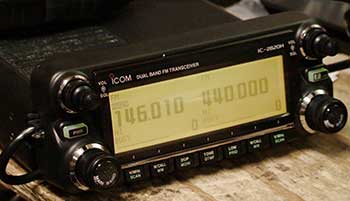
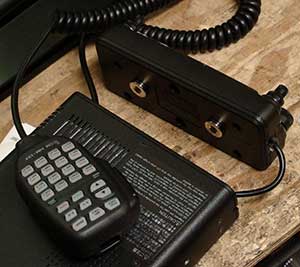
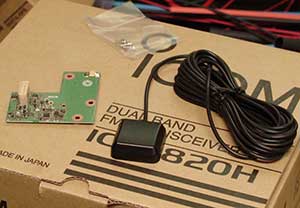
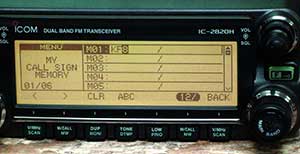
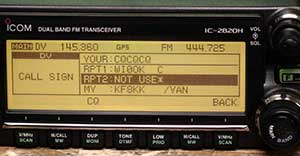
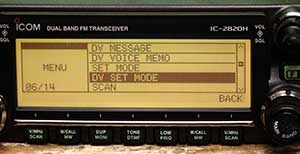
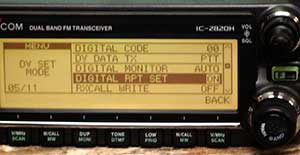
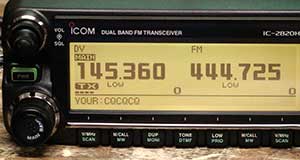
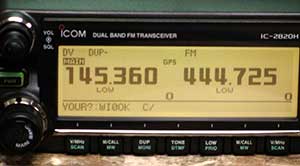
The Icom IC-2820 is right up there with the Kenwood TMD700A as being a swell radio to have.

Many hams cannot seem to understand why some of us will swoon over dualband transceivers that cost hundreds more than simpler models, and insist on being able to listen on more than one frequency at a particular time (often with two conversations blaring from the speakers at the same time).
For those of us die hards who enjoy quality and convenience the 'top grade' radio gear is not a matter of wasted money, but of getting what you pay for. When one considers what transceivers cost back in the 1970's, even at near $900, the DStar equipped 2820 is a good value for what you get.

I've had my IC-2820 for over a year now and I'm very pleased. I use it on analog and DStar voice. I also enjoy the diversity reception mode-- which is helpful when I'm amongst trees and hills. I have not made use of the GPS for anything, nor have I used the slow-speed-data modes. I have had the occasion to set the unit up for crossband repeat, which functions fine-- but it only works in Analog (no, you cannot use it to gateway from analog to digital!).

If I had any complaint it would be that the display could be brighter and with more contrast. I've been spoiled by the EXCELLENT display on the ID800-- which is the best LCD display I've ever seen. Sadly, the Icom microphones can develop an insensitive PTT button that requires a heavy push. The audio from the mic is also highly shaped and while the speech is highly intelligible, it's very definitely NOT 'hi-fi'.

Here's a shot of my IC-2820 pretty much right out of the box.

Icom supplies both a long and a short cable for connecting the control head to the transceiver.

The microphone connects to the transceiver body. Just a small modular cable connects to the head. You can extend the microphone line with an ethernet CAT5 cable and coupler-- I've used CAT5 cables on this and IC-207's for years with good results.

This photo shows how the control head looks when it is stuck to the front of the transceiver body.

As you can see, the 'head' is taller than the 'body' which looks a bit odd, but trust me-- you WILL learn to get used to that if you use it in this mode.

ic-2820 rearview

You can see the two strong magnets that are on the back of the control head in this shot. These magnets can make a mobile installation much more convenient-- especially if you have a classic car with a metal dash!

If your vehicle doesn't have a metal dash you can glue a piece of metal in place and the head will adhere nicely to that. There are funny little indentations on the front of the transceiver body that accept these magnets for those who want the control head and radio attached to each other directly.

To make the IC-2820 operate DStar you need the UT-123 optional module.

Here is the module and it's supplied GPS antenna.

The front/top of the UT-123 is shown here.

On the upper left you can see the AMBE codec chip that is the piece that digitizes and un-digitizes the audio.

The bottom of the UT-123 has a single connector that snaps into the chassis of the IC-2820.

Here's the RF connector that attaches the GPS antenna to the transceiver.

Please note that the GPS antenna socket is in the middle-front of the transceiver body and is NOT designed to be used with the control head affixed to the transceiver body. If you wish to run the GPS (for DPRS or whatnot) you will have to use the control head in a 'remote' location from the transceiver.

If you remove one of the covers from the radio you can get to see the main circuit board and all sorts of goodies.

If you open the other side of the transceiver body you will find the speaker, heat sink, and the mounting location for the UT-123 (at the lower right).

Just snap the UT-123 into place and screw it down with the three screws that Icom supplies. You now have a DStar equipped radio!

Now that you have DStar you will have to familiarize yourself with some interesting menu settings to make it work.

Sorry, but the DStar mode will NOT work 'out of the box' without your having to set things up on your radio. This is plug-n-fiddleWithIt...

You first need to get to the menu mode by hitting the 'F' button on the right and then the far right bottom button 'MENU' will take you to the top level setup menu. Scroll up and down with the right hand frequency knob.

Select the 'CALL SIGN MEMORY' and hit the right side frequency selection knob/button. From there you can see the three main categories of callsign configurations. For most of us you can LEAVE THE YOUR CALL SIGN memory set to the default (which should be CQCQCQ -- double check this on your radio!).

Scroll down using the frequency knob and select the 'MY CALL SIGN MEMORY' mode and hit the right side frequency button.

You now can enter your callsign.

Note the prompts at the bottom of the screen. The arrows allow you to move the cursor forward and back, CLR clears the display, ABC is for selecting letters and 12/ is for selecting numbers or symbols.

Dstar allows you to add some funky suffixes to your call if you wish. In my case, my IC-2820 is normally used in my trusty '79 GMC van--- and I have a '/VAN' appended to my callsign to denote this. This is separate from a text field that you can also append to your transmissions if desired.

While the variance in the display color in this photo has everything to do with my camera (or possibly an errant mouse click in Photoshop) rest assured the IC-2820 can indeed produce a display of that color! While it cannot do as many colors as an FT-857, it does allow you some choices. I'm old fashioned and prefer standard amber.

If you're planning to operate through a repeater you should program in a 'RPT CALL SIGN MEMORY' for the repeater.

While the DStar IC-2820 can 'automatically' set itself up to operate through a local repeater, be advised that you will have to kerchunk the repeater a few times whenever you turn the rig onto that channel in order that the repeater and your 2820 'handshake' the parameters. I would highly advise that you program in your local repeaters in the RPT CALL SIGN MEMORY so that your first couple of calls on the repeater don't end up in the bit bucket. Remember that old saying 'if a tree falls in a forest and nobody is around...' Well, the corollary is 'if a DStar user didn't program the repeater memory and makes a call...'

Programming a repeater memory isn't hard, but you MUST remember that it is customary to have a letter in the 8th character position to denote the frequency band of the repeater. All two meter repeaters use a 'C', 70cm repeaters use a 'B', and if you're running 1.2ghz you get to put an 'A' in that 8th position.

If you cannot understand what I mean by '8th character position' then PLEASE, PLEASE!, stay on analog and forget about DStar!!! Perhaps a less technology intense pastime would be better for you (longer life, less frustrations, etc).

When you're done setting up your callsigns you can find this dandy little menu somewhere in the menu tree that will display what you have setup.

There is a position for 'RPT2' and that is used for those who will be linking via a gateway to either another regional repeater or via the internet.

Back at the main menu you have more selections to choose from and setup. You will want to select the DV SET MODE and hit the right side frequency button to advance to the next set of menus.

From the DV Set Mode menu you can enable the radio to operate through that repeater you just added to memory.

At this point you should be able to key up your transmitter and emit a DStar transmission.

As you can see in the upper left of the display, the DV indicates you are in DStar mode on that side of the transceiver (the FM on the right is for analog).

The photo shows my transmission and it is calling for another station (the 'your') of callsign CQCQCQ which is the default CQ for DStar.

When I unkeyed from the above transmission the repeater almost immediately dropped it's carrier and then about two seconds (ok, perhaps it's three) the repeater keyed up again and transmitted an acknowledgement back to my radio which caused the 'YOUR?:WI0OK C/' response. This signifies that my transmission was indeed relayed by the repeater and gives it's callsign. If I do NOT get this acknowledgement then I know that my transmission was not relayed by the repeater and something is wrong.


ver 8/08